
Mini Greenhouse Building Guide: Extend Your Growing Season
For gardening enthusiasts, seasonal changes often mean interruptions in planting—seedlings risk being damaged by late spring frosts, while autumn frosts can cut the growing season short. A mini greenhouse solves this problem by creating a warm, stable microenvironment that can extend the growing season by 2–3 months. Whether it’s for raising early-spring vegetable seedlings, protecting late-autumn flowers, or overwintering tropical plants, a mini greenhouse makes it possible. This practical guide will walk you through building a home-friendly mini greenhouse from scratch.
I. Choosing the Right Type of Mini Greenhouse: Select According to Your Needs
1. Windowsill Micro Greenhouse: Ideal for Small Spaces
If you only have a windowsill or a corner of a balcony, a windowsill greenhouse is the best option. Low-cost and easy to build, it requires just a transparent plastic storage box (20–30 cm deep is ideal). Drill 3–5 ventilation holes, about 1 cm in diameter, into the lid and sides, and place a 5 cm layer of perlite or clay pebbles at the bottom for drainage before setting in seed trays. This provides basic insulation for succulents, herbs, or vegetable seedlings. In winter, place it on a south-facing windowsill to benefit from daytime sunlight and cover it with insulating material at night to prevent frost damage.
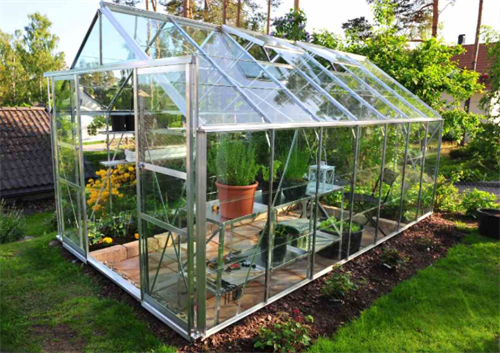
2. Small Backyard Greenhouse: For Medium-Scale Gardening
If you have a small yard or patio, consider building a 1–2 m² greenhouse. A lightweight aluminum alloy or PVC frame works well, shaped into a 2 m long, 1 m wide, 1.5 m high arch. Cover the top and sides with 4 mm-thick transparent polycarbonate panels, which offer better wind resistance than plastic film and last for over five years. Leave one side with a sliding door for easy access and management. A 10 cm-high low wall at the base prevents rainwater from seeping in. Inside, use tiered plant stands to grow vegetables or keep potted flowers.
II. Key Construction Points: Ensuring Practicality
1. Location: Prioritize Sunlight and Shelter from Wind
Place the greenhouse where it can receive at least four hours of direct sunlight daily, ideally facing south to maximize natural heat gain. Avoid windy areas such as yard edges or narrow passages beside buildings. If strong winds are unavoidable, plant shrubs or install windbreak panels around the greenhouse to reduce heat loss. Proximity to a water source is also important to make watering more convenient and reduce maintenance effort.
2. Temperature and Ventilation Management: Balancing Growth Conditions
Temperature control is the core function of a greenhouse. In winter, hang a thermometer inside; if temperatures drop below 5°C, use a small electric heater (under 500 watts, kept away from flammable materials) or cover the structure with insulating blankets at night. In spring, as temperatures rise, open the door or vents during the day to prevent overheating and excessive plant elongation (most plants grow best between 15–25°C). Good ventilation also reduces humidity and helps prevent pests and diseases, especially after watering—air out the greenhouse for 1–2 hours.
III. Seasonal Use: Maximizing Extended Growing Time
Once built, a mini greenhouse can serve you year-round:
Early spring (February–March): Start vegetable seedlings like tomatoes and cucumbers indoors, ready for transplanting outdoors a month earlier than usual.
Summer: Cover with shade cloth to create a cooling shelter for shade-loving plants.
Autumn (October–November): Grow cold-tolerant greens such as lettuce and spinach to extend the harvest season.
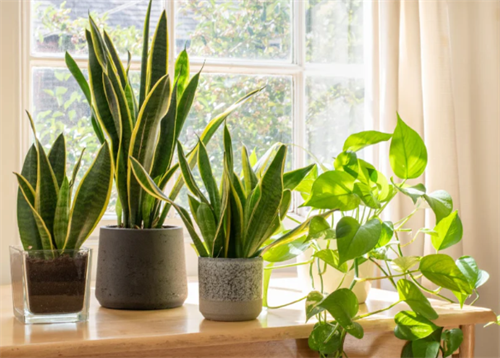
Winter: Protect tropical plants such as bougainvillea and pothos from frost damage.
Building a mini greenhouse doesn’t require advanced skills—just choose the right type for your space and needs, and master a few basic management techniques. With it, you can break free from seasonal limits and enjoy gardening all year long.
RELATED GUIDES
Top 10 Air-Purifying Plants: Improve Indoor Air Quality
Indoor air pollution is often overlooked, and houseplants serve as natural “air purifiers.”
Garden Path Design Inspiration: Choosing Stone, Wood, and Gravel
Garden paths act as the “lifelines” linking key features and as a “language” expressing the garden’s personality.
Shade-Tolerant Plant Selection: Ideal Species for Low-Light Areas
Indoor north-facing rooms, corridor corners, or outdoor shaded spots behind trees or buildings often lack sufficient light, making plant growth challenging.
Home Vegetable Garden Planning: Fresh Vegetables All Year Round
With growing concerns over food safety, having a home vegetable garden and planting fresh produce by hand has become a lifestyle pursuit for many.